Replacing old, worn carpet breathes new life into a home, and it’s one of those upgrades that homeowners notice every single day. Whether you’re covering cold concrete in a basement, refreshing a bedroom, or tackling the entire upstairs, carpet installation isn’t quite as simple as rolling out a rug. From choosing the right fiber and padding to understanding subfloor prep and seam placement, the process involves decisions that affect comfort, durability, and cost for years to come. This guide walks through everything from material selection to maintenance, helping homeowners decide whether to hire professionals or tackle the job themselves.
Table of Contents
ToggleKey Takeaways
- New carpet installation improves home comfort, sound dampening, and thermal insulation while instantly refreshing a room’s appearance without additional renovations.
- Nylon and triexta fibers offer the best balance of durability and cost for most homeowners, with carpet density and quality padding being more important than thickness for long-term performance.
- Proper subfloor preparation—including moisture testing on concrete, screw-down loose boards, and thorough vacuuming—is critical to prevent buckling, mold, and premature carpet wear.
- Professional carpet installation with power stretchers and seam irons is recommended for projects over 300 square feet or involving stairs and multiple seams, as improper stretching and seaming cause costly failures.
- Maintain new carpet through twice-weekly vacuuming in high-traffic areas, immediate spill blotting, and professional deep-cleaning every 12–18 months to extend lifespan to 10–15 years.
Understanding the Benefits of New Carpet Installation
Carpet does more than cover a floor, it insulates, dampens sound, and cushions falls better than any hard surface. In colder climates, carpet’s R-value (thermal resistance) can reduce heating costs, especially over uninsulated subfloors like concrete slabs or crawlspaces. Homes with young children or elderly residents benefit from the slip resistance and impact absorption that pad-and-carpet systems provide.
Beyond function, carpet updates a room’s aesthetic instantly. Old carpet shows traffic patterns, stains, and compression that no amount of cleaning can reverse. New carpet resets the space, often making furniture and wall colors look fresher without changing anything else. It’s also one of the few flooring types that can be installed over most existing subfloors, plywood, OSB, concrete, even existing vinyl, provided the surface is level and dry.
For allergy-prone households, modern carpets with low-VOC certifications (like Green Label Plus) and built-in stain treatments trap dust and allergens rather than letting them circulate, assuming regular vacuuming. This makes carpet a practical choice in bedrooms and living areas where comfort and air quality matter most.
Choosing the Right Carpet for Your Space
Carpet selection comes down to fiber type, pile style, and density, three factors that determine durability, feel, and price. High-traffic areas like hallways and stairs demand tougher fibers and tighter twists, while bedrooms can use softer, less dense options.
Pile style affects both look and performance. Cut pile (plush, textured, frieze) is the most common for residential spaces. Plush shows footprints and vacuum marks but feels luxurious. Textured and frieze twist fibers tightly to hide wear and work well in family rooms. Loop pile (Berber) is durable and stain-resistant, ideal for basements and rental properties, but snags easily if pets have long nails. Cut-and-loop combines both for pattern interest.
Carpet density matters more than thickness. Press your thumb into a sample, if you feel the backing easily, it won’t hold up. Dense carpets (higher face weight, measured in ounces per square yard) resist crushing and last longer. Pair any carpet with quality padding: 7/16-inch rebond pad (6–8 lb. density) is standard for most residential installs. Thicker isn’t always better, padding over 1/2 inch can cause wrinkles and premature wear.
Carpet Materials and Fiber Types
Fiber choice drives cost and performance. Nylon is the workhorse, durable, resilient, stain-resistant (especially with built-in treatments like Stainmaster), and best for high-traffic zones. It’s pricier but holds up for 10–15 years in active households. Polyester (PET) offers vibrant color and softness at a lower price point, though it mats down faster and works better in bedrooms or low-traffic areas. Olefin (polypropylene) resists moisture and stains, making it common in basements and outdoor-adjacent spaces, but it crushes easily and feels less plush.
Triexta (branded as SmartStrand) sits between nylon and polyester, soft, stain-resistant, made partly from renewable materials, and increasingly popular for whole-home installs. Wool is the premium natural option: durable, naturally flame-retardant, and luxurious, but expensive and requires more maintenance. For most DIYers replacing carpet on a budget, nylon or triexta delivers the best balance of performance and cost.
Preparing Your Home for Carpet Installation
Prep work determines whether a carpet install lasts two years or twenty. Start by removing all furniture, including items in closets. Installers can work around furniture for an upcharge, but it slows the job and increases the risk of seams in bad spots.
Pull up old carpet and padding, then inspect the subfloor. Wood subfloors (plywood or OSB) should be dry, flat within 3/16 inch over 10 feet, and free of squeaks. Screw down loose boards and fill low spots with floor patch compound. Concrete slabs need a moisture test, tape a 2×2-foot plastic sheet to the floor overnight: if condensation forms underneath, moisture mitigation (sealer or vapor barrier) is required before carpet goes down. Wet subfloors rot padding and create mold.
Remove old tack strips only if they’re damaged or rusty. Reusing existing strips saves time and money. Replace any broken pieces and add strips where they’re missing, typically 1/2 inch from the wall, nailed or glued down depending on subfloor type. Sweep and vacuum thoroughly. Dust under the pad telegraphs through carpet and wears fibers prematurely.
Let carpet and padding acclimate in the room for 24 hours before install, especially in extreme temperatures or humidity. Carpet expands and contracts slightly: acclimation prevents buckling or gaps later.
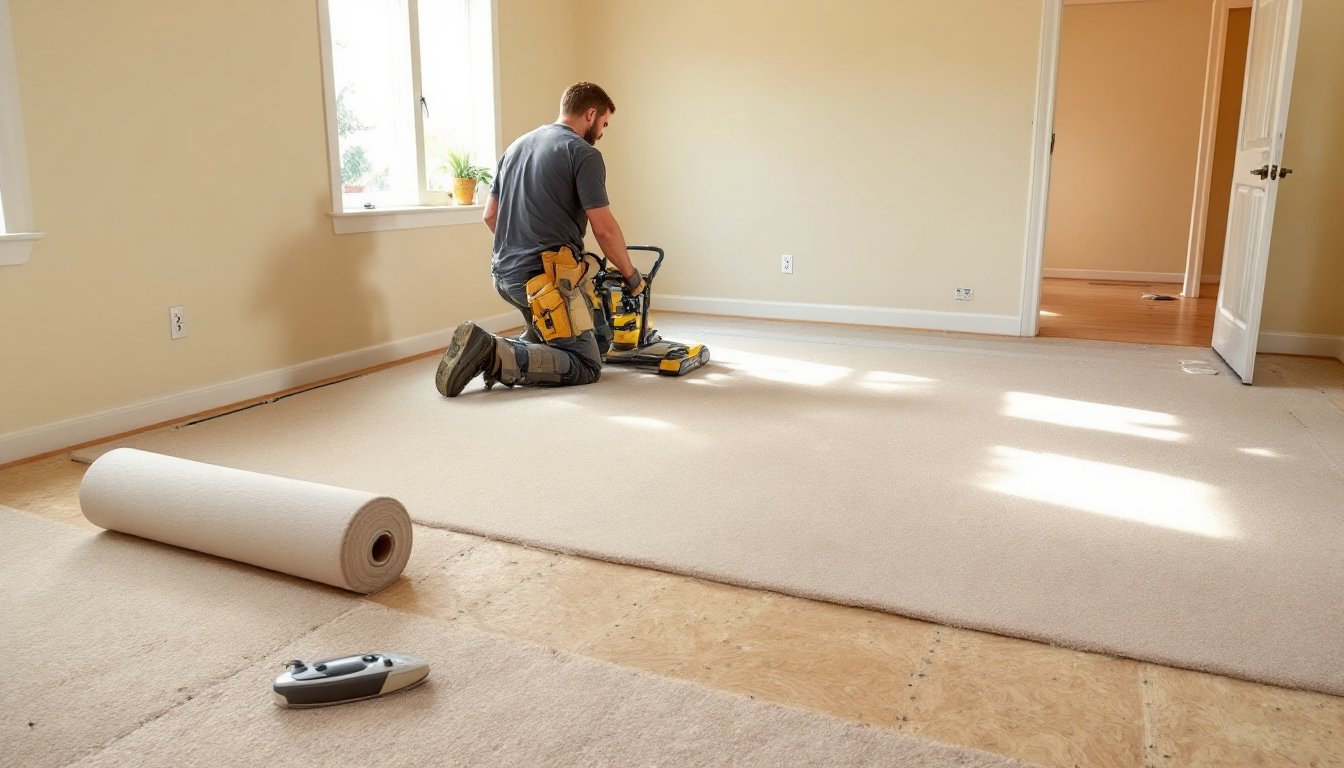
The Carpet Installation Process: What to Expect
Professional carpet installation typically takes 4–6 hours for an average room (12×15 feet), longer for whole-home jobs with stairs and multiple seams. The process starts with tack strip placement if not already in place, sharp, angled strips that grip carpet edges and hold tension.
Next, installers roll out padding and staple or tape it to the subfloor, butting seams tightly without overlapping. Gaps or overlaps create soft spots that wear faster. Padding stops about 1 inch short of tack strips to leave room for carpet edges.
Carpet is rolled out, rough-cut to size with a few inches of excess, and positioned in the room. Seams (unavoidable in most installs) should run perpendicular to windows to minimize visibility and never fall in doorways or high-traffic lanes. Installers use a seaming iron and heat-activated seam tape to join sections, then trim and press seams flat with a seam roller.
The carpet is stretched using a power stretcher, a long pole with teeth that hooks the carpet and levers it onto tack strips. Proper stretching is critical: under-stretched carpet ripples within months. Installers work from the center outward, hooking edges onto tack strips and tucking excess into the gap between the strip and wall using a knee kicker and stair tool. Doorways get metal transition strips to finish edges cleanly and prevent fraying.
Final trimming along baseboards uses a wall trimmer, and vacuuming removes loose fibers. Walk the room afterward to check for lumps, loose edges, or visible seams. Any issues should be addressed before the crew leaves, it’s far harder to fix later.
Professional Installation vs. DIY: Making the Right Choice
Carpet installation is DIY-friendly in small, square rooms with no seams, but challenging once stairs, seams, or tricky layouts enter the picture. Specialized tools, power stretcher, seaming iron, knee kicker, cost $200–$500 to buy or $50–$100/day to rent. That rental fee alone closes the gap with many professional quotes, especially since most retailers offer free or low-cost install with purchase.
Professional installation runs $0.50–$1.50 per square foot for labor, depending on region and complexity. Many homeowners researching contractor cost estimators find that bundled pricing (carpet + pad + install) from big-box stores often beats buying materials separately and hiring independently. Pros also warranty their work, if seams split or carpet ripples within the first year, they’ll return to fix it.
DIY makes sense for a single bedroom, closet, or bonus room where mistakes won’t be catastrophic. It requires patience, a helper for stretching, and careful measuring. Seams are the biggest challenge, poorly ironed seams separate or show backing, and there’s no fixing that without replacing sections. Stairs multiply difficulty: each riser and tread must be cut precisely and stretched without creating bubbles.
If the project involves more than 300 square feet, multiple rooms, or stairs, professional install is the smarter call. The tools, technique, and speed pros bring prevent costly do-overs. For small, simple spaces, DIY can save a few hundred dollars, just budget extra material for mistakes and don’t skip the power stretcher rental.
Caring for Your New Carpet
New carpet looks best when it’s maintained from day one, not after traffic patterns set in. Vacuum high-traffic areas twice weekly using a vacuum with strong suction and a rotating brush (or beater bar). For cut-pile carpets, vacuum in multiple directions to lift fibers. Loop-pile (Berber) does better with suction-only settings to avoid snagging loops.
Address spills immediately. Blot, don’t rub, with a clean white cloth, working from the outside in to prevent spreading. Use carpet-specific cleaners: dish soap and household cleaners often leave residue that attracts dirt. For tough stains, many homeowners consult project planning guides or hire professionals rather than risk damage with aggressive scrubbing or steam.
Deep-clean carpets every 12–18 months using hot water extraction (steam cleaning). Rent a machine or hire a service, most manufacturers require periodic professional cleaning to maintain warranties. Over-wetting is a common DIY mistake: excess water soaks padding and can cause mold. Use minimal water and ensure good airflow (fans, open windows) for faster drying.
Use walk-off mats at exterior doors to trap dirt and grit before it reaches carpet. Grit acts like sandpaper on fibers, causing premature wear. Rotate furniture occasionally to distribute weight and prevent permanent indentations. For heavy furniture, use coasters or furniture cups to spread the load. With consistent care, quality carpet in a moderate-traffic home can last 10–15 years before replacement is necessary.
Finally, when comparing providers for future home services, checking reviews on platforms like Angi helps homeowners find reliable contractors for both installation and maintenance projects.