Metal kitchen islands have become a staple in modern kitchens, combining restaurant-grade durability with a refined industrial aesthetic. They’re not just for commercial kitchens anymore, homeowners are embracing the clean lines, low maintenance, and versatility that metal brings to the heart of the home. Whether someone’s planning a full kitchen remodel or looking to add a functional centerpiece, a metal island offers both practical workspace and visual impact. The right choice depends on style preferences, budget, and how the island will be used day-to-day.
Table of Contents
ToggleKey Takeaways
- Metal kitchen islands offer superior durability, heat resistance, and non-porous surfaces that eliminate bacteria and food safety concerns better than traditional wood or laminate materials.
- Stainless steel dominates the market with multiple options—304 stainless for residential use provides excellent corrosion resistance, while 16-gauge thickness ensures heavy-duty prep work without denting.
- Plan for at least 42 inches of clearance on all sides of your metal kitchen island to maintain comfortable workflow, and measure your space carefully before purchasing to ensure proper fit and proportions.
- A metal kitchen island requires minimal maintenance compared to wood or concrete—simply wipe daily with warm soapy water, and use specialized stainless steel cleaner for fingerprints rather than harsh scrubbers that scratch surfaces.
- Brass and copper islands bring warmth and luxury appeal but require more care and work best as accent pieces, while stainless steel excels as a primary workhorse prep surface for frequent cooks.
Why Choose a Metal Kitchen Island Over Traditional Materials
Metal kitchen islands outperform wood and laminate in several key areas, particularly for homeowners who cook frequently or need a workhorse prep surface.
Durability and heat resistance top the list. Stainless steel, the most common metal choice, can withstand direct heat from pots and pans without scorching or warping. Unlike butcher block or tile, a metal surface won’t crack, swell, or absorb moisture. That makes it ideal for rolling dough, prepping raw meat, or setting down a hot Dutch oven without reaching for a trivet.
Sanitation is another major advantage. Metal surfaces are non-porous, meaning bacteria and food particles can’t penetrate the material. A quick wipe with hot soapy water or a mild disinfectant keeps the surface restaurant-clean. This is why commercial kitchens default to stainless steel, it meets NSF standards for food safety.
Low maintenance seals the deal for many DIYers. Metal doesn’t require sealing, oiling, or refinishing like wood or concrete. Scratches and patina develop over time, giving the island a lived-in character rather than looking worn out. For those who want a pristine finish, a quick buff with a stainless steel cleaner restores the shine.
Finally, weight capacity matters. Metal frames and shelving can support heavy stand mixers, Dutch ovens, and small appliances without sagging. When anchored properly to the floor, a metal island can handle commercial-grade equipment that would stress a wooden structure.
The tradeoffs? Metal is louder than wood when chopping or setting down dishes, and it can feel cold to the touch in an unheated space. Some homeowners pair a metal island with a wood cutting board insert or a butcher block section to balance function and warmth.
Popular Metal Kitchen Island Styles and Designs
Metal islands come in a range of finishes and configurations. The right style depends on the kitchen’s overall aesthetic and how the island will be used.
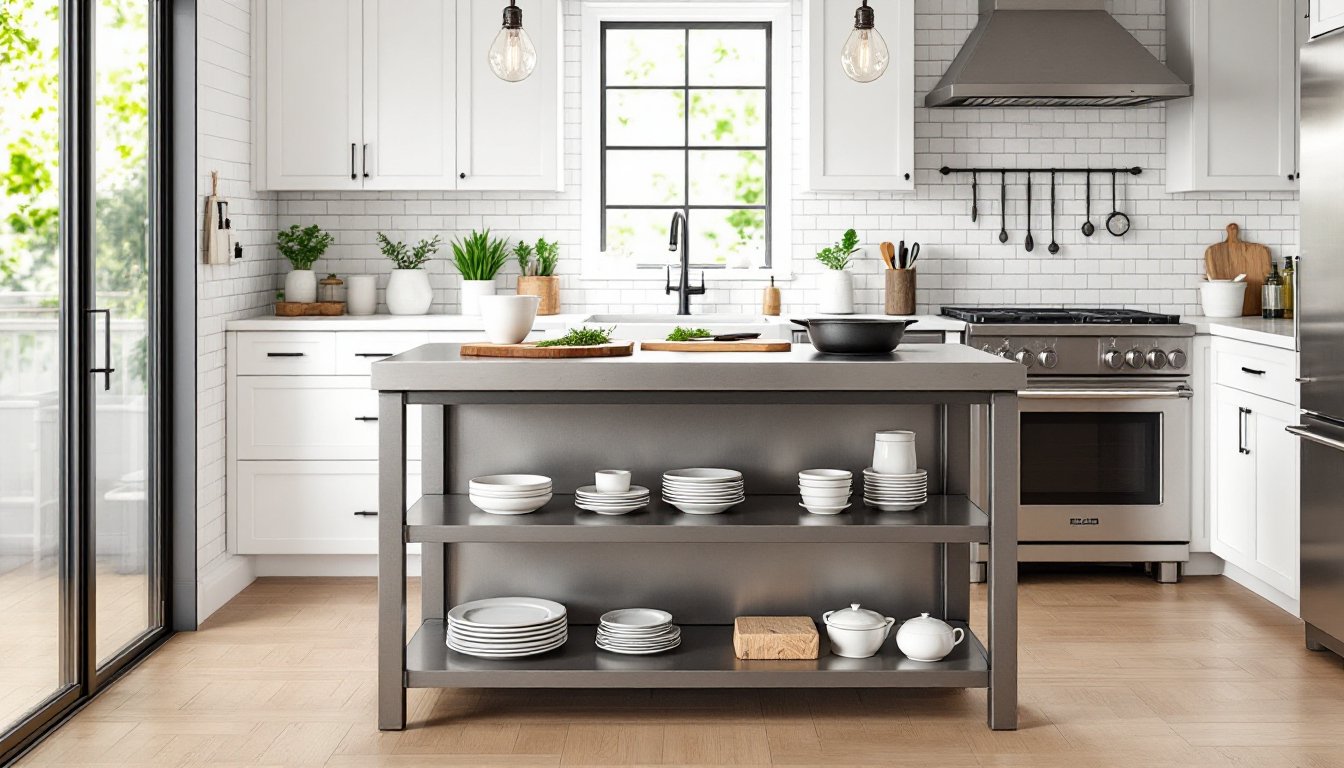
Stainless Steel Kitchen Islands
Stainless steel dominates the metal island market for good reason. It’s available in multiple grades, 304 stainless (18% chromium, 8% nickel) is the standard for residential use, offering excellent corrosion resistance and a bright finish. 430 stainless costs less but can show fingerprints more readily and isn’t as rust-resistant in humid climates.
Design-wise, stainless islands fall into three categories:
- Commercial-style carts: Rolling units with open shelving, often 24″ to 30″ wide and 36″ high. These work well in smaller kitchens or as auxiliary prep stations. Look for locking casters rated for at least 150 lbs per wheel.
- Built-in islands with storage: Fixed units with cabinets, drawers, or wine racks. These typically feature a welded stainless frame with stainless or powder-coated steel panels. Expect to pay $1,200–$4,000 depending on size and custom features.
- Hybrid designs: Stainless top with a wood or metal base. This approach adds warmth while keeping the work surface durable. Popular with kitchen design ideas that blend industrial and farmhouse styles.
For a cohesive look, match the island’s finish to existing appliances. Brushed stainless hides fingerprints better than polished, and it pairs well with matte cabinet hardware.
Brass and Copper Kitchen Islands
Brass and copper islands bring warmth and a touch of luxury to kitchens leaning into the industrial or vintage aesthetic. Both metals develop a natural patina over time, brass shifts from bright gold to a muted bronze, while copper moves from rosy pink to deep brown with green undertones.
Brass islands are less common but striking. They work best as accent pieces rather than primary prep surfaces, since brass is softer than stainless and more prone to dents. Many designs feature brass cladding over a steel frame, or brass accents on legs and trim. Unsealed brass requires periodic polishing to maintain its shine, though many homeowners prefer the aged look.
Copper islands are similarly soft and require more care. Copper reacts with acidic foods (tomatoes, citrus), which can stain or discolor the surface. For this reason, copper is often used as a decorative wrap on island sides or as a trim detail, with a stainless or wood prep surface on top. Copper’s antimicrobial properties are a bonus, studies show it kills bacteria faster than stainless steel.
Both metals suit kitchens with exposed brick, reclaimed wood, or black cabinetry. They’re statement pieces, so keep the rest of the kitchen understated to avoid visual clutter.
How to Select the Right Metal Kitchen Island for Your Space
Choosing the right metal island starts with measuring the kitchen and defining how the island will be used.
Clearance and workflow come first. The general rule: leave at least 42 inches of clearance on all sides of the island for comfortable traffic flow. In a galley kitchen or tight U-shape, 36 inches works but feels cramped when two people are cooking. Measure from the island’s edge to the nearest cabinet, appliance, or wall, don’t guess.
Next, consider size and proportions. A standard island height is 36 inches (countertop level), but many homeowners add a raised bar section at 42 inches for seating. Width and depth vary widely: a compact island might be 24″ x 48″, while a large family-size unit can stretch to 48″ x 96″ or more. Balance the island’s footprint with the room’s scale, an oversized island in a small kitchen blocks pathways and feels oppressive.
Functionality drives design decisions. Ask:
- Will this be primarily a prep surface, or does it need storage, seating, or appliances?
- Does the household need electrical outlets or plumbing for a sink or dishwasher?
- Will it stay stationary, or should it roll for flexibility?
For islands with electrical or plumbing, check local codes. Running power or water lines to a freestanding island often requires a permit and a licensed electrician or plumber. The National Electrical Code (NEC) requires GFCI-protected outlets in kitchens, and outlets on islands must be accessible without reaching over the countertop.
Material thickness affects both durability and price. For stainless steel, a 16-gauge top (0.0625″ thick) handles heavy use without denting. 18-gauge (0.050″) is common in mid-range units and fine for moderate use, but 20-gauge and thinner feels flimsy and dents easily. If comparing units, thicker gauge = more metal = stronger surface.
Finally, browse metal kitchen island designs to get a sense of what’s available. Look at professional photos to see how different finishes and configurations fit into real kitchens, it’s easier to envision scale and style that way.
Installation and Maintenance Tips for Metal Kitchen Islands
Installing a metal kitchen island ranges from a simple DIY task to a job that requires a contractor, depending on the unit’s complexity.
Freestanding carts are the easiest. Most arrive fully assembled or require minimal setup, attaching legs, mounting shelves, or locking casters. Check that the floor is level before positioning the island. If it wobbles, adjust the feet (if equipped) or shim the legs with plastic shims. For carts with locking casters, engage the locks on at least two wheels to prevent movement during use.
Fixed islands need more planning. These are typically anchored to the floor to prevent tipping, especially if they include a raised bar or heavy stone top. For wood subfloors, use 3-inch construction screws driven into floor joists (locate joists with a stud finder first). For concrete, use tapcon screws or concrete anchors rated for the island’s weight plus contents.
If adding electrical outlets, run wiring before securing the island. For a code-compliant install, the outlet must be within the island’s footprint, no extension cords trailing across the floor. If the island’s base is hollow, a licensed electrician can often fish wire through the floor and up into the cabinet. Budget $300–$600 for a basic outlet installation, more if the breaker panel is far from the island.
Plumbing is trickier. Adding a sink requires running supply lines and a drain through the floor. In a raised foundation or basement, this is straightforward but messy. On a concrete slab, it means cutting into the slab, expensive and disruptive. Unless the kitchen is already undergoing a major remodel, most DIYers skip the sink and stick with a dry island.
For maintenance, metal islands are forgiving but not maintenance-free:
- Stainless steel: Wipe down daily with warm water and dish soap. For stuck-on food, use a non-abrasive sponge or a paste of baking soda and water. Avoid steel wool and harsh cleaners, which scratch the surface. For fingerprints and smudges, a dedicated stainless steel cleaner (like Bar Keepers Friend or Weiman) restores the shine. Buff in the direction of the grain to avoid streaks.
- Brass and copper: Dust regularly and wipe spills immediately. For polishing, use a commercial brass or copper cleaner, or make a paste with equal parts flour, salt, and white vinegar. Rub gently, rinse, and dry thoroughly. To preserve patina, skip the polish and just wash with mild soap.
- Powder-coated steel: Wipe with a damp cloth. Avoid abrasive cleaners that can chip the coating. Touch up scratches with a matching paint pen if needed.
Safety note: When moving or installing a heavy island, get a second person to help. Metal islands can weigh 100–300 lbs, and lifting solo risks back injury or dropping the unit. Wear work gloves to protect hands from sharp edges during assembly.
For more steel kitchen island ideas and styling tips, look at how designers layer metal with other materials, wood, stone, or concrete, to soften the industrial edge and create a balanced workspace.
Conclusion
Metal kitchen islands deliver lasting value for homeowners who prioritize durability, sanitation, and style. Whether choosing stainless steel for its workhorse performance or brass for its warm patina, the right island becomes the functional centerpiece of the kitchen. With proper installation and minimal upkeep, a metal island stands up to decades of daily use.