When an LG refrigerator stops cooling, the compressor is often the culprit. This heart of the cooling system pumps refrigerant through coils, and when it fails, you’re left with spoiled food and a tough decision: repair or replace the entire unit. Compressor replacement is one of the more complex appliance repairs, but it’s not always out of reach for a capable DIYer with the right tools and electrical knowledge. That said, this job involves refrigerant handling, high-voltage electrical work, and warranty considerations that might make professional help the smarter route. This guide walks through diagnosis, warranty coverage, the DIY-versus-pro decision, and what’s involved if you decide to tackle the repair yourself.
Table of Contents
ToggleKey Takeaways
- An LG refrigerator compressor replacement is a complex repair requiring high-voltage electrical work and refrigerant handling, making professional service advisable for most homeowners.
- Check your warranty status before attempting DIY work, as unauthorized compressor replacement voids coverage on LG refrigerators under sealed system warranty protection.
- Warning signs of compressor failure include lack of cooling, unusual noises like clicking or grinding, constant running without cycling, and excessive heat, so diagnose carefully before purchasing parts.
- Professional compressor replacement costs $400–$800 combined, while DIY attempts require $200–$400 in specialty tools plus parts if you don’t already own brazing and vacuum equipment.
- For refrigerators over 10 years old or when repair costs exceed 50% of replacement value, purchasing a new energy-efficient unit makes more financial sense than compressor replacement.
Signs Your LG Refrigerator Compressor Needs Replacement
A failing compressor doesn’t always announce itself with a dramatic breakdown. Sometimes the signs are subtle, showing up over days or weeks before the refrigerator quits entirely.
The most obvious indicator is lack of cooling. If both the refrigerator and freezer compartments are warmer than their set temperatures and adjusting the thermostat does nothing, the compressor may not be circulating refrigerant. Before assuming compressor failure, check that the condenser coils (usually on the back or underneath) aren’t caked with dust, which can cause similar symptoms.
Unusual noises point to mechanical trouble. A healthy compressor hums quietly when running. Listen for clicking sounds that repeat every few minutes, this often means the compressor is trying to start but failing, a condition called “hard starting.” Loud rattling, grinding, or knocking from the compressor area suggests internal components have worn out or broken loose.
Another telltale sign is a compressor that runs constantly without cycling off. Compressors normally run in intervals, shutting down once the compartment reaches the target temperature. If yours never stops, it’s working overtime to compensate for a mechanical issue or refrigerant leak, and it will eventually burn out.
Finally, if the compressor is hot to the touch (careful, wear gloves), that’s abnormal. Some warmth is expected during operation, but excessive heat combined with poor cooling indicates the motor is struggling and likely near failure. If the compressor won’t start at all and you’ve ruled out electrical issues like a tripped breaker or faulty start relay, internal mechanical failure is the likely diagnosis.
Understanding Compressor Warranty Coverage on LG Refrigerators
Before buying parts or calling a technician, check your warranty status. LG offers different coverage tiers, and the compressor often carries extended protection compared to other components.
Most LG refrigerators come with a one-year full warranty covering parts and labor on all components. Beyond that, LG typically provides a sealed system warranty that covers the compressor, condenser, evaporator, and connecting tubing for five to ten years depending on the model and purchase date. This sealed system coverage usually includes the compressor itself but often excludes labor costs after the first year.
If your refrigerator is within the sealed system warranty period, LG may provide the compressor at no charge, but you’ll likely pay for the technician’s labor unless you purchased an extended service plan. This can still save hundreds of dollars compared to paying for both parts and labor out of pocket.
To verify your coverage, locate your model and serial number (usually on a sticker inside the fresh food compartment or on the left interior wall). Call LG customer service or check their warranty portal online. Have your purchase date ready, if you don’t have a receipt, the serial number can help LG determine the manufacturing date, though they may require proof of purchase for warranty claims.
One critical caveat: warranty coverage is typically void if a non-authorized technician performs the repair. If your compressor is under warranty, you’ll need to use an LG-authorized service provider to maintain coverage on other components. This is a major factor in the DIY-versus-professional decision.
DIY vs. Professional Replacement: Making the Right Choice
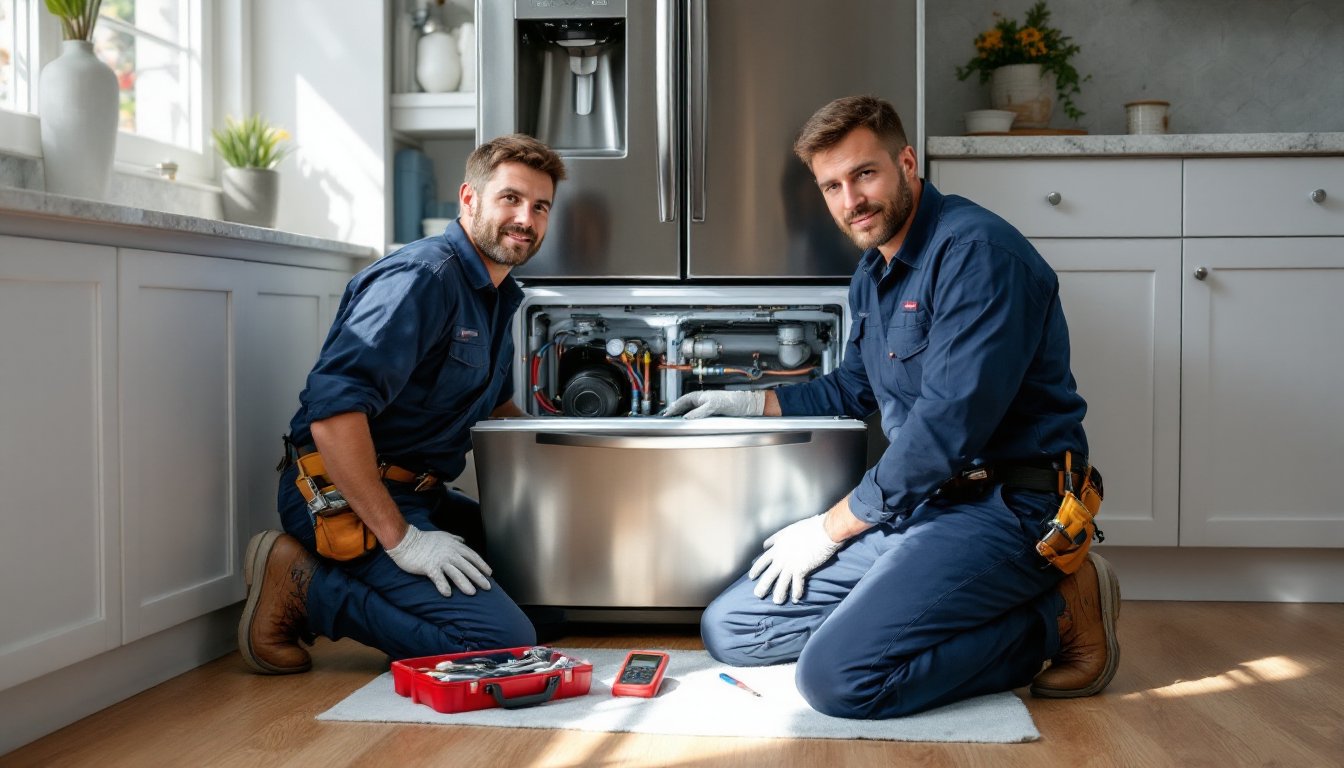
Compressor replacement sits at the upper end of DIY appliance repair difficulty. It’s doable for someone with electrical and refrigeration experience, but most homeowners are better off hiring a professional.
Here’s what makes this job challenging: You’re working with high-voltage electrical connections (120V), pressurized refrigerant that requires EPA-certified recovery and recharging, and sealed copper tubing that must be brazed (not soldered) for a leak-free connection. If you’ve never worked with HVAC systems or done electrical work beyond swapping outlets, this isn’t the project to learn on.
Consider going professional if:
- Your refrigerator is under any warranty coverage. Unauthorized repairs will void it.
- You don’t own or can’t rent a vacuum pump, manifold gauge set, and oxy-acetylene torch for brazing.
- You lack EPA 608 certification (legally required to purchase and handle refrigerant, though enforcement is inconsistent for homeowner repairs).
- The refrigerator is built-in or requires extensive disassembly to access the compressor.
- You’re uncomfortable working with live electrical connections.
The DIY route makes sense when:
- The refrigerator is out of warranty and repair costs approach replacement value.
- You have HVAC or appliance repair experience and the necessary tools.
- You can source a compatible compressor (exact voltage, BTU rating, and refrigerant type).
- You’re confident diagnosing that the compressor, not the start relay, overload protector, or thermostat, is the actual problem.
Be honest about your skill level. A botched compressor replacement can damage the sealed system beyond repair, turning a $400 repair into a $1,500 refrigerator replacement. When working with refrigerator repair basics, professional guidance helps avoid costly mistakes.
Step-by-Step Guide to Replacing an LG Refrigerator Compressor
This section is for informational purposes. Compressor replacement involves refrigerant handling and electrical work that may be regulated in your area. If you’re not qualified, hire a technician.
Tools and Parts You’ll Need
Gather everything before starting, this isn’t a job to pause halfway through.
Tools:
- Manifold gauge set (for refrigerant recovery and recharge)
- Vacuum pump (to evacuate the system)
- Oxy-acetylene torch or brazing kit (propane torches don’t get hot enough)
- Tubing cutter
- Multimeter
- Adjustable wrench and socket set
- Silver brazing rods and flux
- Piercing valve or line tap (for refrigerant recovery if no service ports exist)
- Safety goggles, gloves, and long sleeves
Parts:
- Replacement compressor (must match your model’s specifications: voltage, BTU, refrigerant type)
- Filter drier (always replace when opening the sealed system)
- Refrigerant (R-134a or R-600a, depending on model, check the data plate)
- Start relay and overload protector (inexpensive insurance to replace while you’re in there)
Safety first: Wear safety goggles and gloves throughout. Refrigerant can cause frostbite on contact, and brazing involves open flame and molten metal.
Steps:
-
Unplug the refrigerator and move it away from the wall for access. Let it sit for at least 30 minutes so refrigerant pressures equalize.
-
Recover the refrigerant. Connect your manifold gauges to the service ports (you may need to install a piercing valve if none exist). Use a recovery machine or carefully vent to an approved recovery cylinder, venting to atmosphere is illegal under EPA regulations. If you’re not certified, this step alone is reason to hire a pro.
-
Disconnect electrical connections. Remove the rear access panel to expose the compressor. Take photos before disconnecting wires from the compressor terminals, start relay, and overload protector. Label everything.
-
Cut the refrigerant lines. Use a tubing cutter to cut the suction line (larger diameter, goes to evaporator) and discharge line (smaller, goes to condenser) about 6 inches from the compressor. Clean cuts matter for brazing later.
-
Remove the old compressor. Unbolt the compressor from its mounts (usually two or three bolts). It’s heavy, around 20-30 pounds, so have a helper or a sturdy surface nearby.
-
Install the new compressor. Position it on the mounts and bolt it down. The compressor usually has rubber grommets to reduce vibration, don’t overtighten and compress them completely.
-
Install a new filter drier in the suction line. This removes moisture and contaminants. Cut the line, braze the drier in place with silver brazing rod (requires 1,200°F+), and let it cool naturally.
-
Braze the refrigerant lines to the new compressor. Clean the copper thoroughly, apply flux, and use silver brazing rod to create leak-free joints. Proper brazing techniques prevent refrigerant leaks that undermine the repair. Flow nitrogen through the lines while brazing to prevent oxidation inside the tubing.
-
Pressure test the system. Use your manifold gauges to pressurize the system with nitrogen to about 150 psi. Let it sit for 30 minutes and watch for pressure drop, which indicates a leak.
-
Evacuate the system. Connect your vacuum pump and pull a deep vacuum (below 500 microns) for at least 45 minutes to remove air and moisture. Moisture in the system will freeze at the expansion device and cause cooling problems.
-
Recharge with refrigerant. Refer to the data plate for the exact refrigerant type and weight (usually measured in ounces). Charge through the low-side port with the compressor running. Overcharging or undercharging both hurt efficiency.
-
Reconnect electrical and install the new start relay and overload protector. Double-check all connections against your photos.
-
Test the system. Plug in the refrigerator and listen. The compressor should start within a few seconds and run smoothly. Check that both compartments begin cooling within 20-30 minutes. Use a thermometer to verify temperatures drop to target range (usually 37°F for fresh food, 0°F for freezer).
-
Reinstall panels and move the refrigerator back into place once you’ve confirmed proper operation.
If any step feels beyond your ability, stop and call a technician. Mistakes here are expensive.
Cost Breakdown: What to Expect for Compressor Replacement
Compressor replacement costs vary widely based on refrigerator age, compressor availability, labor rates, and whether warranty coverage applies.
Professional repair typically runs $400 to $800 for parts and labor combined. The compressor itself costs $150-$350 depending on the model, with labor making up the rest. High-end or built-in models can push costs above $1,000. Regional differences matter, expect higher rates in metro areas. Costs for refrigerator compressor repairs reflect both parts availability and local labor markets.
Breaking it down:
- Compressor: $150-$350 (OEM parts cost more but fit precisely: aftermarket saves money but may require adaptation)
- Filter drier: $15-$30
- Refrigerant: $50-$100 (depends on type and amount)
- Labor: $200-$400 (2-4 hours for an experienced technician)
- Service call/diagnosis: $75-$150 (sometimes waived if you proceed with repair)
DIY costs drop to $200-$400 if you already own the specialty tools. If you’re buying or renting a vacuum pump ($150-$300 to buy, $40-$60/day to rent), manifold gauges ($80-$200), and brazing equipment ($100-$200), you’ll spend $350-$500 just on tools for a one-time repair.
When repair doesn’t make sense: If your LG refrigerator is over 10 years old or the repair estimate exceeds 50% of replacement cost, consider buying new. Compressor failure often indicates the refrigerator has reached the end of its service life, and other components may fail soon. A new mid-range refrigerator starts around $800-$1,200 and includes a full warranty.
If the repair cost is borderline, factor in energy efficiency. Newer refrigerators use 30-40% less electricity than models from 2010 or earlier, potentially saving $50-$100/year on utility bills.
Conclusion
Replacing an LG refrigerator compressor is feasible for experienced DIYers with the right tools and knowledge, but it’s not a beginner project. The combination of refrigerant handling, electrical work, and brazing requires skills most homeowners don’t have. Check warranty coverage before deciding, if your compressor is still covered, professional repair through an authorized technician protects your investment. For out-of-warranty units, weigh repair costs against the refrigerator’s age and replacement value. When in doubt, get a professional diagnosis. A qualified technician can confirm whether the compressor is truly the problem and whether repair makes financial sense.