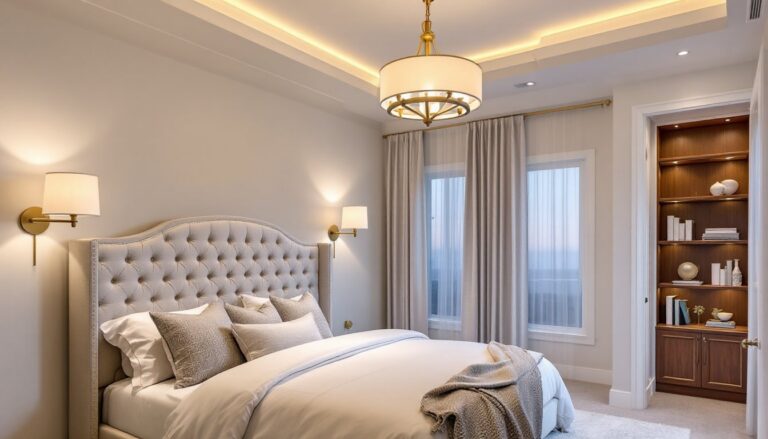
Bathroom real estate is at a premium, especially in older homes and urban apartments where square footage dictates every design decision. A modern walk-in shower tub combo offers a practical answer: full bathing functionality without sacrificing half the room. Unlike dated fiberglass alcove units or clunky retrofit inserts, today’s combos blend low-threshold accessibility with clean-lined aesthetics, think frameless glass, matte fixtures, and non-porous composite bases. They’re particularly smart for full baths that serve multiple users or homes where a standalone tub and separate shower simply won’t fit. This guide covers what defines a walk-in combo, why it’s worth considering, design and material options, installation realities, cost ranges, and upkeep.
Table of Contents
ToggleKey Takeaways
- A modern walk-in shower tub combo maximizes bathroom space by combining full bathing functionality in a single footprint with a low-threshold entry of just 3–6 inches, ideal for homes and apartments where square footage is limited.
- Walk-in shower tub combos offer superior accessibility, reduce fall risk for older adults and children, and preserve floor area for other fixtures while maintaining resale value by satisfying both families with young children and buyers seeking soaking options.
- Installation requires careful planning including structural floor reinforcement (joists should be 2×10 or larger for second-floor installs), proper waterproofing with liquid or sheet membranes, and code compliance—most regions treat tub-shower swaps as like-for-like replacements but verify local requirements.
- Material choices range from lightweight acrylic tubs ($400–$1,200) to cultured marble and tile-set bases, with frameless or semi-frameless glass doors and modern finishes like matte black hardware completing the contemporary aesthetic.
- Professional installation costs typically range from $5,000–$12,000 depending on materials and labor, while DIY projects can run $2,000–$6,000 if you have the skills for plumbing, tiling, and waterproofing.
- Proper maintenance—including daily squeegee use, weekly mildew prevention, monthly caulk inspection, and humidity-sensing exhaust fans—is critical to preventing mold and delamination, making ventilation the most important factor in long-term longevity.
What Is a Walk-In Shower Tub Combo?
A walk-in shower tub combo integrates a bathtub and shower in a single footprint, featuring a low-threshold or curbless entry on at least one side. The “walk-in” designation refers to reduced step-over height, typically 3–6 inches, compared to standard tubs that sit 14–16 inches off the floor.
Most units anchor the tub along one wall with a hinged or sliding glass door on the open side, eliminating the need for a separate shower pan and enclosure. The tub itself may be soaking depth (16–20 inches) or shallower (12–14 inches) depending on accessibility priorities. Grab bars, built-in seating, and handheld showerheads are common additions.
These systems differ from simple tub-shower surrounds in two ways: the intentional low-entry design and the inclusion of modern materials like acrylic composites, gel-coated fiberglass, or tile-set bases that resist mold and cracking better than older fiberglass shells. They’re code-compliant for ADA accessibility in many configurations, though verify local requirements if installing in a commercial or rental property.
Why Choose a Modern Walk-In Shower Tub Combo?
Space Efficiency and Functionality
A standard alcove tub occupies 60 inches × 30–32 inches, the same footprint as many walk-in combos. By combining both functions, homeowners preserve floor area for vanities, storage, or wider doorways. This matters in bathrooms under 50 square feet, where separate fixtures force awkward layouts or code violations on clearance (the IRC requires 21 inches in front of the toilet and 30 inches in front of the tub).
Accessibility is the other driver. Low-threshold entry reduces fall risk for older adults, kids, and anyone with mobility limits. Many bathroom remodels in tight spaces prioritize this feature, pairing it with anti-slip flooring and lever-handle faucets.
Resale value also plays a role. Homes with at least one full tub retain broader buyer appeal, families with young children and buyers who want soaking options prefer tubs over shower-only setups. A modern combo satisfies both camps without the square-footage penalty of dual installations.
Design Styles and Material Options
Contemporary walk-in combos lean into minimalism: frameless or semi-frameless tempered glass panels (⅜-inch or ½-inch thick), matte black or brushed nickel hardware, and neutral palettes. Tile surrounds in large-format porcelain (12×24 or bigger) reduce grout lines and visual clutter. Subway tile still appears but often in vertical or herringbone patterns.
Material choices for the tub base:
- Acrylic: Lightweight, warm to the touch, easy to clean. Standard wall thickness is 5–7 mm: reinforced bases add fiberglass backing for rigidity. Acrylic scratches more easily than composites but can be buffed out.
- Cultured marble or solid-surface composites: Non-porous, stain-resistant, and available in integrated tub-surround units. Heavier than acrylic, plan for floor-joist reinforcement if installing on a second story.
- Tile-set bases: Custom option using a mortar bed or foam pan with waterproof membrane (Schluter, RedGard). Allows exact dimensions and drain placement but requires skilled tile-setting and longer cure times.
Glass and enclosure options:
- Frameless pivot doors: Cleanest look, but hinge hardware bears the full weight of ⅜-inch glass. Requires solid blocking in wall studs.
- Sliding panels: Better for narrow bathrooms where door swing is an issue. Track systems collect soap scum, choose models with removable rollers.
- Fixed panel + curtain hybrid: Budget-friendly. A single glass panel covers the showerhead side: a tension rod and curtain close the tub end.
For a cohesive design, match the shower valve trim and tub filler finish. Thermostatic valves (mixing hot and cold to a set temp) prevent scalding and meet modern fixture standards in remodels, though they cost $150–$400 more than pressure-balance valves.
Installation Considerations and Requirements
Permitting and codes: Most jurisdictions classify a tub-shower swap as a like-for-like replacement, which may not require a permit if you’re not moving plumbing or altering structure. Adding a combo where none existed, especially if it affects floor joists, drain routing, or electrical (for in-wall lighting or heated floors), typically does. Check with your local building department before demo.
Structural prep:
- Floor support: A filled acrylic tub plus user weight can exceed 500 pounds. Joists should be 2×10 or larger on 16-inch centers for second-floor installs. Sistering joists or adding blocking may be necessary.
- Walls: Remove drywall to studs (at minimum 6 inches above the tub deck). Install ½-inch cement board or foam backer (Kerdi-Board, GoBoard) as a tile substrate, or use a prefab surround kit that bonds directly to studs with construction adhesive and mechanical fasteners.
- Waterproofing: Apply a liquid or sheet membrane over seams, corners, and fastener penetrations. RedGard and Aquadefense are common brush-on products: Schluter and Laticrete make bonded sheet systems. Skipping this step invites mold and subfloor rot within two years.
Plumbing rough-in:
- Shower valve height: 48 inches to the centerline (adjust for user height preferences).
- Tub spout: 4 inches above the tub deck or per manufacturer specs.
- Drain: Standard tub drains are 1½-inch pipe: ensure the P-trap is accessible via an access panel in an adjacent room or crawlspace.
If the existing drain is off-center or the new tub is longer/shorter, you’ll need to reroute, this often means opening the ceiling below or cutting the subfloor. Hire a licensed plumber if you’re not comfortable sweating copper or working with PEX and SharkBite fittings under pressure.
Glass installation: Frameless panels attach via U-channel at the curb, fixed clips at the wall, and pivot hinges. Walls must be plumb within ⅛ inch over 60 inches: out-of-plumb framing causes gaps and leaks. If walls are wavy, a semi-frameless system with adjustable channels is more forgiving.
Safety gear: Wear safety glasses when cutting tile or cement board (silica dust), hearing protection for angle grinders and reciprocating saws, and respirator masks (N95 minimum) during demolition or when mixing thinset. Gloves are non-negotiable when handling glass edges or sheet metal.
Cost Breakdown: What to Budget
Prices vary by region, material grade, and whether it’s DIY or contractor-installed. The following are 2026 averages for a standard 60×32-inch alcove combo:
Materials (DIY supply costs):
- Acrylic tub: $400–$1,200
- Composite or cultured-marble unit: $1,000–$2,500
- Frameless glass door: $600–$1,800 (⅜-inch clear glass, pivot hinge)
- Tile and backer: $3–$12 per square foot (budget $600–$1,500 for a 5×8-foot surround)
- Shower valve and trim: $150–$600 (Moen, Delta, Kohler mid-range)
- Waterproofing membrane and adhesive: $100–$300
- Miscellaneous (cement board screws, grout, silicone, transition strips): $150–$250
DIY total: $2,000–$6,000 depending on finish level.
Professional installation:
- Demolition and disposal: $300–$700
- Framing and backer install: $500–$1,200
- Plumbing (valve, drain, spout): $600–$1,500
- Tile-setting: $8–$18 per square foot labor ($640–$1,440 for 80 sq ft)
- Glass door installation: $200–$500
Contractor total (materials + labor): $5,000–$12,000. High-end tile, custom glass, or structural work (joist reinforcement, drain relocation) pushes costs toward $15,000.
For accurate renovation budgeting and contractor estimates, request three itemized bids and verify that each includes waterproofing, code compliance, and warranty coverage on labor. Many pros warranty their work for one year: glass and fixtures carry manufacturer warranties (5–10 years typical).
Maintenance and Cleaning Tips
Daily and weekly:
- Squeegee glass panels after each shower to prevent hard-water spots. A $10 silicone-blade squeegee does the job, hang it on a suction hook inside the enclosure.
- Wipe down acrylic or composite surfaces with a microfiber cloth and pH-neutral cleaner (dish soap works). Avoid abrasive pads or acidic cleaners (vinegar, lime-Away), which etch the finish over time.
- Spray tile grout with a mildew-inhibiting cleaner weekly if the bathroom lacks a fan. Run the exhaust fan (rated at 50 CFM minimum for baths under 100 sq ft) during and for 20 minutes after every shower.
Monthly:
- Remove and clean sliding-door rollers or pivot-hinge pins. Hair and soap buildup cause sticking and premature wear.
- Check silicone caulk along the tub deck, wall joints, and door threshold. Re-caulk any cracked or discolored sections with 100% silicone (not latex/acrylic blends, which shrink and mildew).
Annually:
- Inspect grout lines for cracks. Seal grout with a penetrating sealer (Aqua Mix, Miracle) if it’s been more than two years, this keeps moisture out of the substrate.
- Test the tub drain stopper and overflow. Clear any hair clogs with a plastic drain snake or remove the stopper assembly and clean the linkage.
Acrylic scratch repair: Light scratches buff out with automotive polishing compound and a microfiber cloth. Deeper gouges require an acrylic repair kit (two-part epoxy filler), wet-sanding with 600–2000 grit paper, and re-polishing.
Hard-water stain removal on glass: Mix equal parts white vinegar and water in a spray bottle, let sit for 10 minutes, then scrub with a non-scratch sponge. For heavy buildup, use a commercial lime remover (CLR, Bar Keepers Friend) following label dwell times. Rinse thoroughly to avoid residue.
Proper ventilation is the single biggest factor in longevity. If the bathroom doesn’t have a window or fan, install a humidity-sensing exhaust fan, it kicks on automatically when moisture hits a set threshold and runs until the air clears. Mold and delamination are almost always ventilation failures, not material defects.