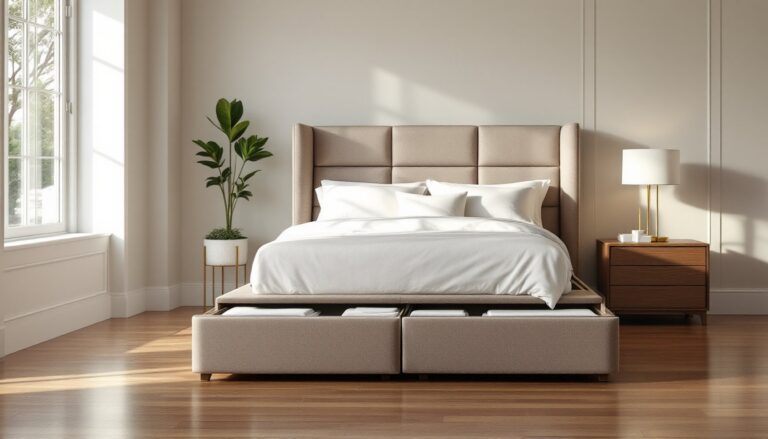
A well-planned cabinet layout can double usable storage without adding a single box. Most kitchens ship with a one-size-fits-all interior, factory shelves spaced for average dishes, no dividers, and zero accommodation for how people actually cook. The result? Stacked pans that require an excavation, spice bottles shoved three-deep, and that one Tupperware lid that’s never seen its matching container. Smart cabinet organization isn’t about buying more bins. It’s about zoning storage by task, leveraging vertical space, and matching accessibility to frequency of use.
Table of Contents
ToggleKey Takeaways
- Kitchen cabinet organization layout based on five functional zones—prep, cooking, serving, storage, and cleaning—reduces clutter and cuts down unnecessary trips during meal prep.
- Pull-out shelves with ball-bearing slides and vertical dividers maximize usable space in deep base cabinets and prevent the waste common in standard one-size-fits-all factory layouts.
- Adjustable shelf spacing in upper cabinets should match item heights (dinner plates need 9-10 inches, mugs 7-8 inches) to eliminate wasted vertical space and improve accessibility.
- Corner cabinets require specialized solutions like blind corner pull-out systems or swing-out shelves to reclaim up to 70% of typically inaccessible space.
- Avoid common mistakes like overloading cabinet doors with racks (which can sag hinges), ignoring actual interior depth measurements, and skipping the evaluation of cabinet layout every 12-18 months as cooking habits change.
Understanding Your Kitchen Cabinet Zones
Professional kitchen designers break cabinet space into five functional zones: prep, cooking, serving, storage, and cleaning. Each zone should hold the tools and ingredients used for that task, cutting down trips across the kitchen mid-recipe.
Prep zone sits near counter workspace, cutting boards, knives, mixing bowls, measuring cups. Cooking zone flanks the range with oils, spices, pans, and utensils within arm’s reach. Serving zone stores everyday dishes and glassware close to the table or island. Storage zone (usually a pantry or tall cabinet) holds dry goods, small appliances, and bulk items. Cleaning zone lives under or beside the sink with trash, recycling, dish soap, and sponges.
This isn’t rigid doctrine. A galley kitchen might combine prep and cooking. An open-plan layout might merge serving and storage. The principle holds: keep related items together and position them where they’re used. Zoning reduces clutter migration, the slow drift of spatulas into the mug cabinet, and makes unloading the dishwasher logical instead of a scavenger hunt.
Measure cabinet interiors before committing to a zone plan. Standard base cabinets run 34.5 inches tall (exterior) with about 30 inches of usable interior height after the countertop and toekick. Wall cabinets vary from 30 to 42 inches tall. Depth matters, too: base cabinets typically sit at 24 inches deep, wall cabinets at 12 inches. Knowing exact dimensions prevents buying organizers that don’t fit and helps calculate how many shelf levels each cabinet can support.
Essential Layout Strategies for Base Cabinets
Base cabinets offer the most volume but waste space fastest without dividers. A 36-inch-wide base cabinet can hold 15+ pots and pans or become a black hole where only the top three are reachable.
Drawer conversions beat fixed shelves for deep cabinets. Pull-out shelves (also called roll-out trays) mount on full-extension ball-bearing slides and bring back-wall items to the front. They’re sold by width, common sizes are 18, 21, and 24 inches to fit standard cabinet frames. Installation requires a drill, #8 x 1-inch screws, and about 20 minutes per shelf. Check the cabinet’s face frame width: undermount slides need about 1.5 inches of side clearance.
Vertical dividers organize baking sheets, cutting boards, and lids that topple when stacked. Adjustable versions use tension rods or pegs slotted into shelf holes. Fixed dividers (cut from 1/4-inch plywood or acrylic) work better for heavy cast iron. Space dividers 2 to 3 inches apart for sheet pans, 1 to 1.5 inches for lids.
The cabinet under the sink is tough, plumbing eats usable space. U-shaped organizers fit around the drainpipe. Tension rods installed horizontally hold spray bottles by their triggers. Skip drawer slides here unless the cabinet has a false drawer front that pulls out with the tray: otherwise, the sink basin blocks vertical clearance.
For corner base cabinets with doors on both sides, studies on effective home organization emphasize accessibility, those deep corners trap items. Lazy Susans help, but two-tier models waste vertical space between levels. Better: pull-out shelves on each door or a blind corner pull-out system that swings out and extends forward. These run $150–$300 depending on size and quality but reclaim 70% of corner volume.
Organizing Upper Cabinets for Daily Access
Upper cabinets should hold lightweight, frequently used items, dishes, glasses, mugs, spices, dry goods. Reaching overhead while holding a hot pot is a recipe for disaster, so keep heavy cookware below the counter.
Shelf height is the most adjustable variable and the most overlooked. Factory shelves sit 10 to 12 inches apart, wasting vertical inches above short items. Drill new peg holes every 1.5 to 2 inches using a pegboard jig for consistent spacing. Dinner plates need about 9 to 10 inches of clearance: cereal boxes, 11 to 12 inches: coffee mugs, 7 to 8 inches. Measure the tallest item in each category, add 1 inch for clearance, and set shelves accordingly.
Risers and tiered organizers create usable layers within a single shelf. Wire or bamboo models lift canned goods, spices, or mugs so rows behind remain visible. Expanding types adjust from 12 to 24 inches wide. Avoid flimsy plastic: look for models rated to hold 10+ pounds per tier.
Door-mounted racks add shallow storage for spices, foil, or cleaning gloves. Most mount with 4 to 6 screws into the door’s inner face. Check door swing clearance, racks add 2 to 4 inches of depth and can collide with shelves when the door closes. European-style frameless cabinets may need adapters if the door is too thin to accept standard screws.
Glass-front cabinets force discipline, only display-worthy items go here. Kitchens that follow professional organizational strategies often reserve these for matching dishware or glassware arranged by size. It’s not just aesthetic: uniform stacks are easier to grab and return without avalanche risk.
Corner Cabinet Solutions That Actually Work
Corner cabinets are the Bermuda Triangle of kitchen storage. Standard 90-degree corners with single doors give access to maybe 40% of interior space: the rest requires a headlamp and elbow grease.
Lazy Susans remain the most common fix. Full-round models need a cabinet at least 33 inches wide to spin freely: kidney-shaped (D-shaped) versions fit smaller corner uppers. Ball-bearing mechanisms last longer than plastic-on-plastic spinners. Load heavy items toward the center and lighter ones at the rim to prevent tipping. Lazy Susans work best for items grabbed individually, canned goods, jars, small appliances, but fail for nested bowls or stacked plates that slide during rotation.
Blind corner pull-out systems use a two-stage mechanism: the front tray pulls forward, the rear tray swings out and extends into the room. Brands like Rev-A-Shelf dominate this category. Measure the cabinet’s opening width (not the exterior dimension) and the depth from the hinge side to the back wall. These units need at least 3 inches of side clearance for the swing mechanism. Installation is more involved than roll-out trays, plan on 60–90 minutes, a drill, and possible shim adjustments if the cabinet isn’t square.
Diagonal corner cabinets (45-degree door fronts) offer easier access than 90-degree corners but sacrifice some capacity. They’re popular in new construction. Retrofit organizers for these include multi-tier Lazy Susans or pull-out baskets mounted on center posts.
For upper corner cabinets, swing-out shelves attach to the door and pivot out when opened, bringing the back corner contents into view. Weight limits run 15 to 25 pounds, so they’re suited for dry goods, baking supplies, or small appliances, not cast iron.
Must-Have Organization Tools and Accessories
The right hardware turns dead space into functional storage. Not all accessories fit all cabinets, measure first, buy second.
Materials list for a typical kitchen cabinet retrofit:
- Pull-out shelves (full-extension, ball-bearing slides): 2–4 per base cabinet
- Adjustable shelf pegs (5mm or 1/4-inch diameter, depending on cabinet holes)
- Drawer dividers (bamboo or expandable plastic): 1–2 per utensil drawer
- Under-shelf baskets (wire, slide-on type): 2–3 for upper cabinets
- Door-mounted racks (spice or foil holders): 1–2 per tall cabinet door
- Lazy Susan (ball-bearing, 16–20 inch diameter): 1 per corner cabinet
- Vertical dividers or tension rods: 2–3 for sheet pan and lid storage
- Tiered shelf risers (wire or bamboo, 12–18 inches wide): 2–3 for canned goods and spices
- Pegboard or grid panel (optional, for pot lids on cabinet door interiors)
Tool list:
- Cordless drill with Phillips bit
- Tape measure (25-foot recommended)
- Level (torpedo or 9-inch)
- Screwdriver (manual, for final tightening)
- Pencil
- Stud finder (if mounting heavy door racks that need extra support)
Under-shelf baskets clip onto existing shelves and hang below, adding a tier for lightweight items, plastic wrap, sandwich bags, or dish towels. They work only if there’s at least 4 inches of clearance between shelf and items below.
Drawer organizers for utensils, cutlery, and gadgets range from fixed bamboo trays to expandable plastic grids. Adjustable models fit drawers from 12 to 24 inches wide. Measure drawer interiors, not the cabinet exterior, drawer boxes are usually 1 to 2 inches narrower than the opening.
Pegboard panels mounted inside cabinet doors hold lids, measuring spoons, or oven mitts. Use 1/4-inch pegboard and metal hooks. Mount with 1-inch screws and check door clearance when closed. Some modern approaches to home organizing systems integrate pegboard into pantries and mudrooms for similar reasons, it’s endlessly reconfigurable.
Labels aren’t glamorous, but they prevent the slow drift back to chaos. Use a label maker or chalkboard labels for bins and baskets. If multiple people use the kitchen, labels cut down on “where’s the…?” questions by half.
Common Cabinet Layout Mistakes to Avoid
Even experienced DIYers make these errors. Most are fixable, but prevention is faster.
Overloading doors with racks and organizers. Cabinet doors are typically 5/8 to 3/4-inch thick and joined with European hinges rated for the door’s weight, not extra cargo. Adding 10+ pounds of spice jars or canned goods can torque hinges and cause doors to sag or misalign. Upgrade to heavy-duty hinges (rated 20+ pounds per pair) if door storage is non-negotiable, or shift weight to in-cabinet organizers.
Ignoring cabinet depth. A 24-inch-deep base cabinet doesn’t mean pull-out shelves can be 24 inches. Account for the door thickness (about 3/4 inch), the face frame (another 3/4 inch on framed cabinets), and 1 to 2 inches of clearance so the tray doesn’t hit the door when closing. Effective pull-out depth is closer to 20 to 21 inches.
Mixing fixed and adjustable shelves randomly. Adjustable shelves (on pegs) work great for items that change, seasonal dishware, growing kids’ cups. Fixed shelves (screwed or dadoed into cabinet sides) offer better load capacity for small appliances or cast iron. Don’t adjust shelves once and forget: when examining effective organization strategies, experts recommend re-evaluating cabinet layouts every 12–18 months as cooking habits shift.
Skipping safety for high cabinets. Wall cabinets mount to wall studs with 3-inch cabinet screws, and organizers inside shouldn’t overload those anchors. A 30-inch-wide upper cabinet can hold 50–75 pounds safely if mounted correctly. Overloading causes cabinets to pull away from the wall, a serious hazard. If adding heavy organizers (e.g., pull-out spice racks, tiered can systems), verify the cabinet’s wall attachment and add screws if needed.
Not measuring before buying. Returns are a hassle. Bring a tape measure, note interior cabinet width, depth, and height, and compare to product specs. “Adjustable” often means a 6-inch range, not infinite. Write down odd dimensions, vintage or custom cabinets rarely follow modern standards.
Forgetting about vertical space. Most cabinets have 6 to 10 inches of unused vertical clearance between the top shelf and the cabinet ceiling. Stackable bins, under-shelf baskets, or an extra shelf level reclaim that space. Simple organizational habits like quarterly shelf audits keep systems from backsliding into clutter.
Conclusion
A smart cabinet layout isn’t a weekend sprint, it’s a series of small retrofits that compound into a kitchen that actually works. Zone items by task, use vertical space, and match storage to how often something gets grabbed. Most improvements need a drill, a tape measure, and an afternoon. Commit to measuring before buying, and the organizers will fit the first time.